Sigil
Instruments and Effects
Manage tracks, mixer controls, soundfonts, FX chains, automation, and modulation.
Instruments and Effects
The Instruments tab is where you build the track list, choose sounds, balance the mix, and shape each part with effects. Every track in the song is configured here.
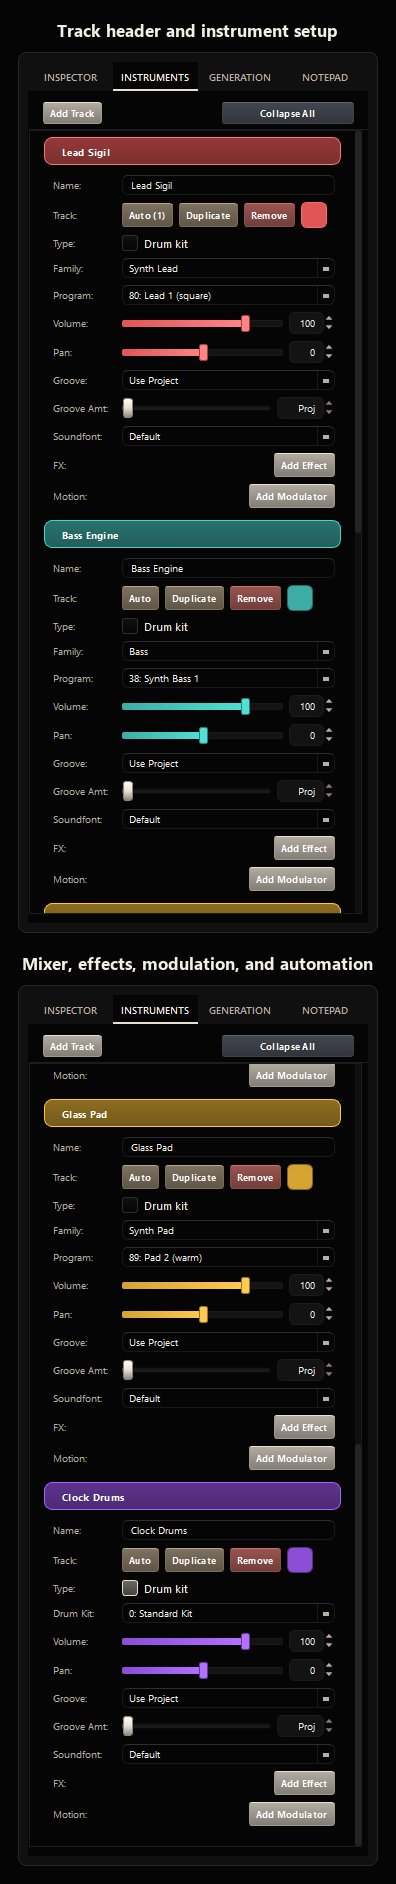 Instruments tab: track list, sound selection, and FX routing
Track management
- Add Track creates a new empty track.
- Collapse All opens or closes track panels so you can see more tracks at once.
- Each track header includes a collapse control, color assignment, and remove action.
Use clear names such as Lead Synth, Bass, Piano, or Hi-Hat. Track names and instrument choices both help the AI understand what each track is meant to do.
Track identity
| Control | Purpose |
|---|---|
| Name | Label shown in the overview, instrument list, and generation targeting. |
| Drums | Marks a track as percussion on MIDI channel 10. |
| Family | Filters General MIDI programs by broad instrument family. |
| Program | Selects the General MIDI instrument for melodic tracks. |
| Drum Kit | Selects the percussion kit for drum tracks. |
Mixer controls
- Mute silences a track without deleting notes.
- Solo plays only soloed tracks.
- Volume controls track output level.
- Pan positions the track left or right.
- Soundfont override lets a single track use a different soundfont from the project default.
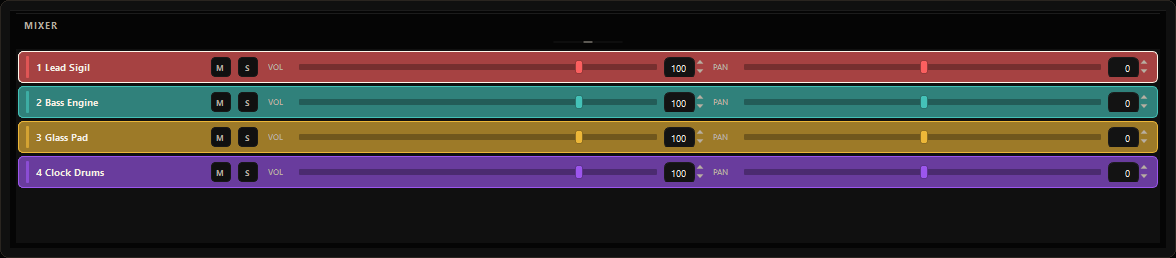 Mixer drawer with per-track level, pan, and routing controls
Per-track groove override
Each track can either follow the project groove or use its own groove setting.
- Use Project follows the Project tab groove.
- Straight disables swing on that track.
- Swing 8ths applies eighth-note swing.
- Swing 16ths applies sixteenth-note swing.
Use this when one part, usually drums, needs a different swing feel from the rest of the arrangement.
FX rack
Each track can have a chain of audio effects. Effects process top to bottom during playback and export.
- Click Add FX to add an effect.
- Toggle an effect off to bypass it without removing it.
- Delete an effect to remove it from the chain.
- Effect settings are saved with the project.
Effects reference
| Effect | What it does |
|---|---|
| Filter | Cuts or boosts frequency bands with low-pass, high-pass, or band-pass modes. |
| Reverb | Adds room or hall ambience. |
| Delay | Adds timed echoes for rhythm or space. |
| Drive | Adds saturation or distortion. |
| Chorus | Thickens sound with pitch-modulated copies. |
| Compressor | Controls dynamic range and evens out peaks. |
| Limiter | Prevents output from exceeding a set ceiling. |
| Noise Gate | Silences signal below a threshold. |
| Phaser | Creates sweeping phase movement. |
| Bitcrush | Adds lo-fi digital degradation. |
| Low Shelf | Boosts or cuts low frequencies. |
| High Shelf | Boosts or cuts high frequencies. |
| Peak EQ | Boosts or cuts a focused frequency band. |
| Pitch Shift | Transposes audio up or down by semitones. |
Filter, Reverb, Delay, Drive, Chorus, and Compressor support Motion controls, which animate key parameters automatically when notes play.
Motion controls
- Motion shape sets the curve, such as Decay, Attack, or Swell.
- Motion amount controls movement intensity.
- Motion rate controls how quickly the animation completes.
Use Motion when every note should carry the same animated gesture, such as a bass sound that starts bright and darkens over its duration.
Automation and modulation
Automation changes track parameters over the song timeline. Modulation changes parameters per note.
Use Automation when a parameter should change at a specific song moment, such as opening a filter at bar 9.
Use Modulation when each note should share the same animated behavior, such as every note triggering a filter decay.
Both can be used on the same track when you need song-level moves and per-note behavior at once.
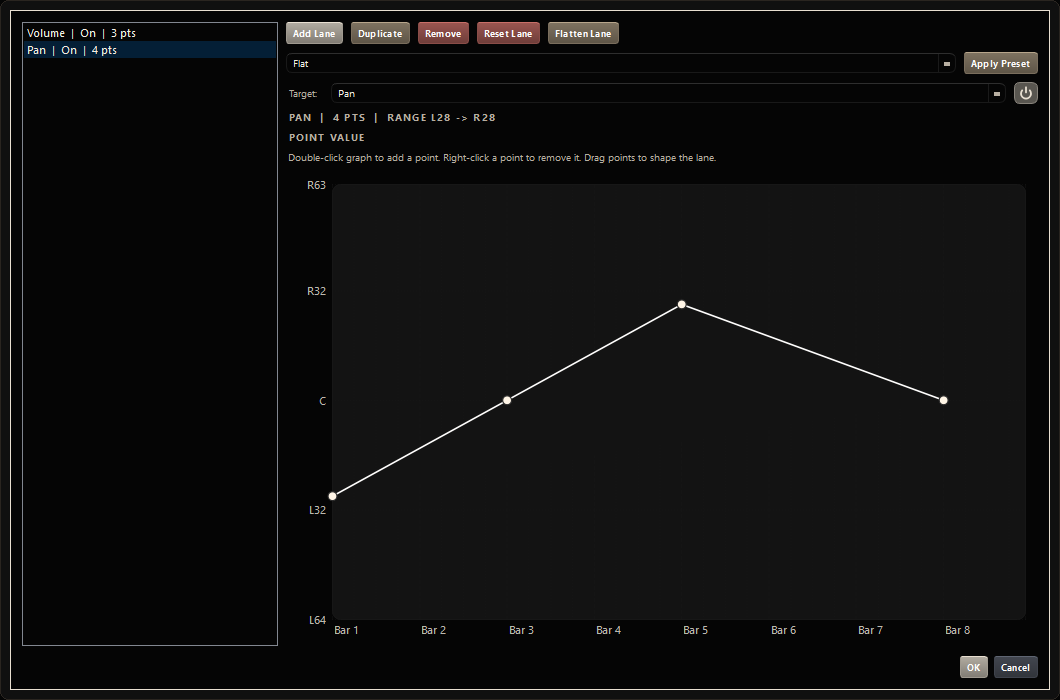 Automation editor for song-timeline parameter changes